Tiles and cladding for the whole house
Waterproofing of terraces and balconies under floor tiles: composition, details and procedure
On the balcony and terrace, water must drain away before it reaches the concrete. Neither the tiles nor the joints are waterproof – only the waterproofing beneath them is. Details are crucial: fall, connection to the wall and door threshold, edge with drainage profile, and expansion joints. We will show the composition, procedure with the liquid waterproofing membrane, and what to do when the balcony is already leaking.
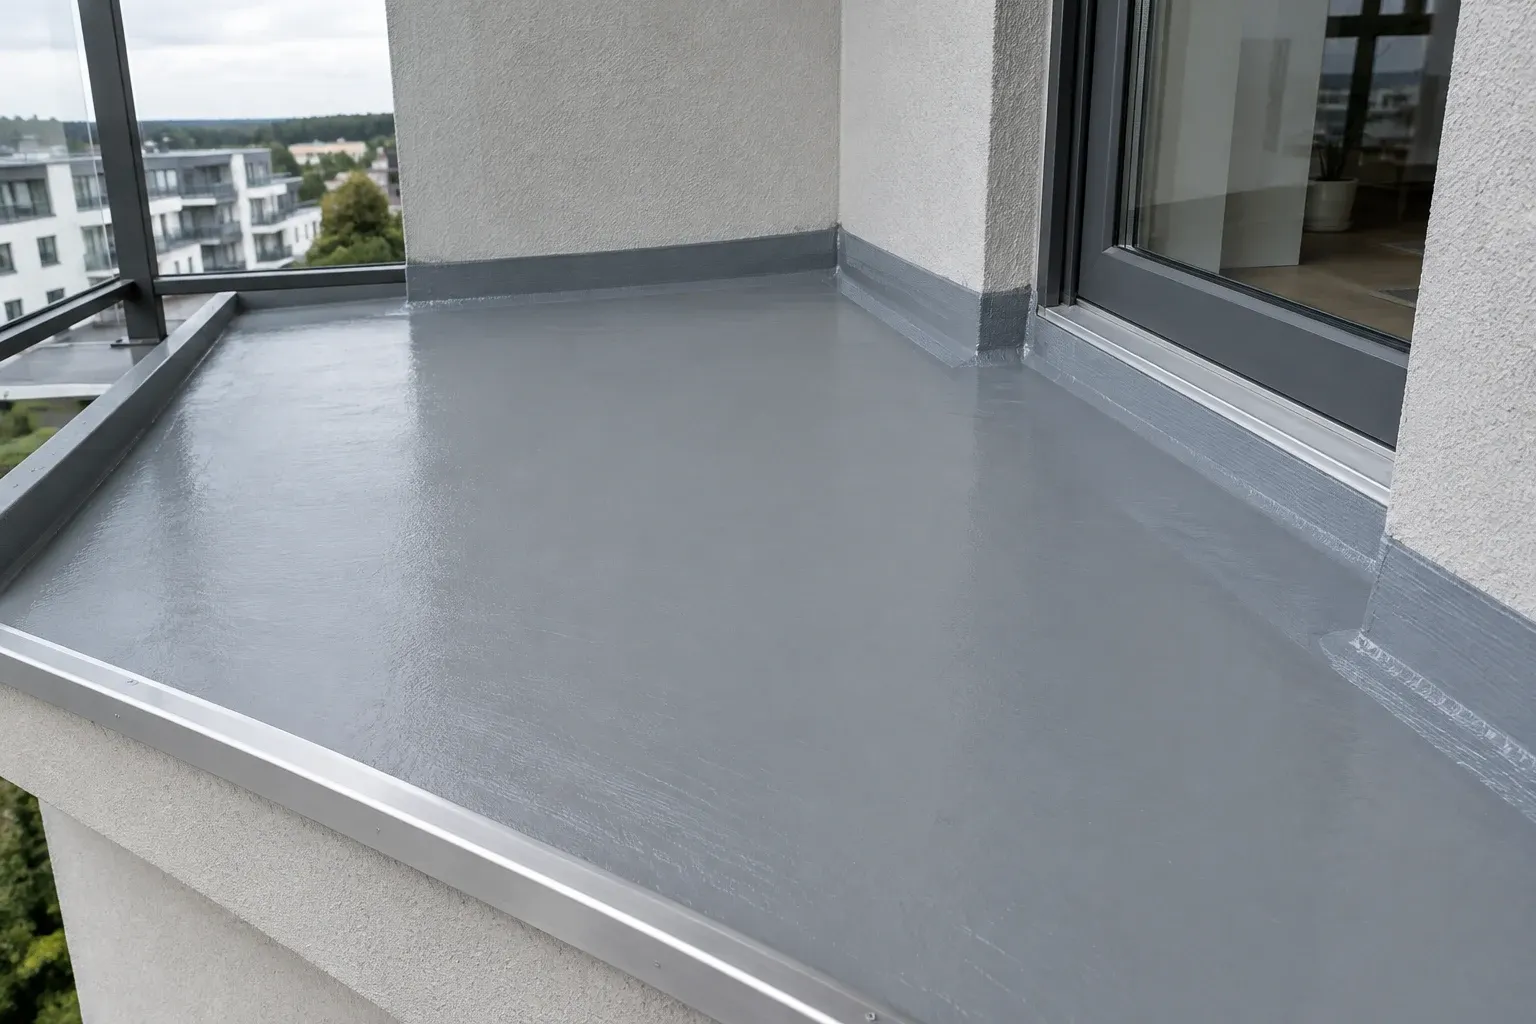
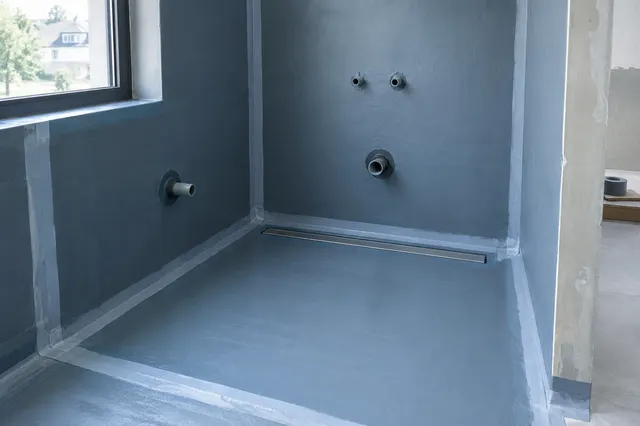
Illustrative image: Balcony with applied liquid waterproofing membrane and sealing tape before laying the floor tiles
Choosing tiles for terraces and balconies, frost resistance, and the composition of layers with bonded tiles are described in the article Terrace: 2 cm tiles for outdoor use. This article goes in-depth into the layer that determines whether the balcony will last – the waterproofing. Types of membranes and how to read their technical data sheet can be found in the article Liquid waterproofing.
Why does the balcony leak
Grouted tiles are not a waterproof layer – water can seep under the tiles through joints and micro-cracks. If there is no functional waterproofing beneath them, the substrate will absorb moisture, freeze in winter, and the tiles will loosen. The first signs are often visible from below: wet spots, white efflorescence, and peeling plaster on the underside of the balcony. Action is needed at this point – moisture shortens the lifespan of the entire structure.
The most common causes are missing or incorrect fall, improperly finished edges without drainage, leaky door thresholds, railing penetrations, and voids in the adhesive where water stands.
Balcony, terrace at ground level and terrace above a room
| Type | What is under the tiles | What to consider |
|---|---|---|
| balcony and loggia on a concrete slab | fall layer, liquid waterproofing membrane, flexible tile adhesive, frost-resistant tiles | edge with drainage, door threshold, in an apartment building agreement with the manager |
| terrace at ground level | substrate concrete with fall, waterproofing, bonded tiles or pedestals | drainage away from the house, connection to the skirting board |
| terrace above a heated room | vapour barrier, thermal insulation, waterproofing and wear layer | it is a flat roof – the composition is designed by the designer |
Ceresit for balconies and terraces above heated rooms explicitly states that a vapour barrier, thermal insulation, and a layer of waterproofing must be installed. Such a terrace should not be tackled as a DIY project.
Fall and drainage
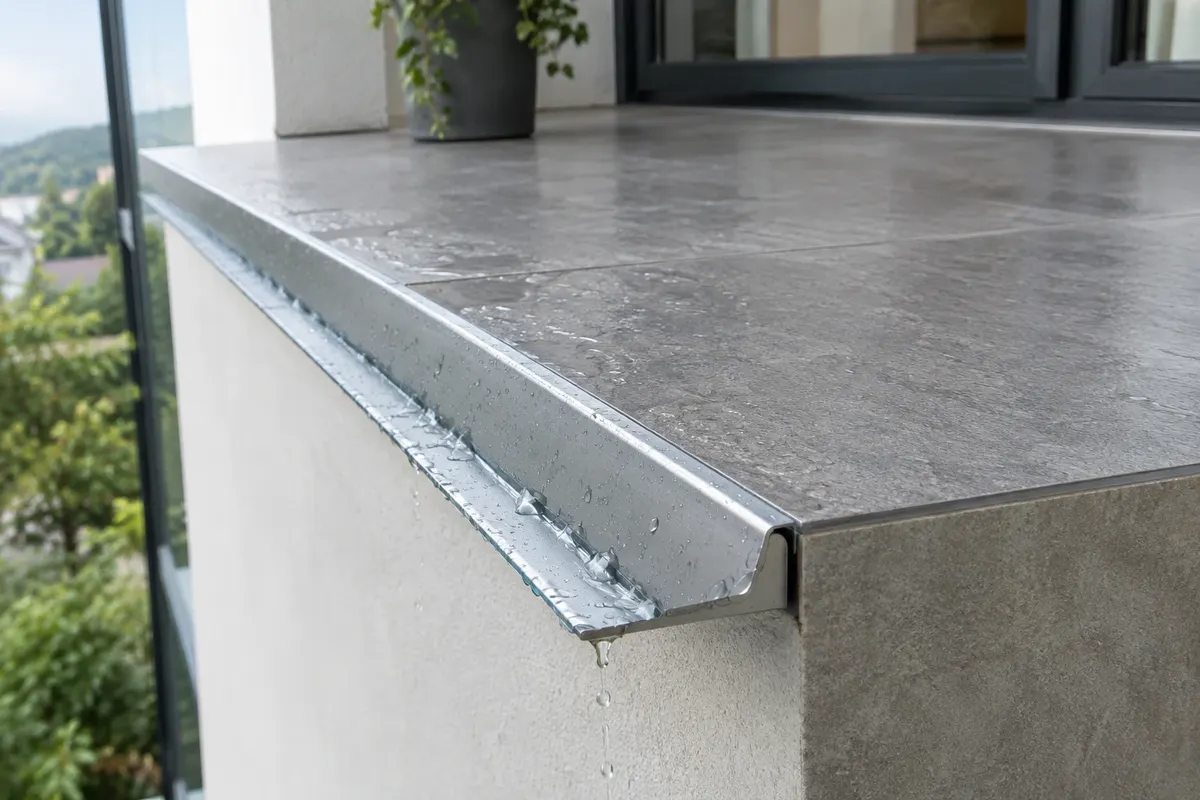
Water must drain away from the balcony. Sika recommends a fall of 1.5 to 2.5% in their balcony system brochure, Kreisel at least 2% for exterior adhesives, and Ceresit for waterproofing CL 50 outdoors at least 2.5%. The fall is created in the substrate – in the concrete or in the fall layer – and the waterproofing follows it. The fall is not created by the thickness of the adhesive. On the balcony, water usually drains over the edge into the drainage profile; on a larger terrace, there may also be a drain or channel. How many centimetres this means in depth for the balcony is shown in the table in the article about tiles for terraces.
Membrane, membrane or foil
- Liquid waterproofing membrane – a cementitious or two-component material applied in two layers. For example, Ceresit CL 50 according to the technical data sheet: layer no more than 1 mm, on balconies and loggias total thickness after drying at least 1.4 mm, consumption 1.65 kg/m² for each millimetre, bridges cracks up to 2.5 mm, and tiles can be adhered after 5 hours.
- Waterproofing membrane – a mat that is glued under the tiles and simultaneously separates the tiles from the movements of the substrate. It is used, for example, in renovations with cracks in the substrate.
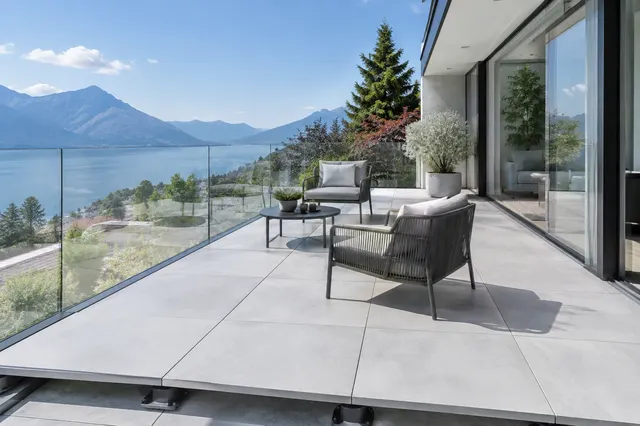
- Membrane – a classic solution under the concrete layer or under floor tiles on pedestals. We describe how tiles on pedestals work over waterproofing in the article Tiles on Pedestals.
Details that make the difference
- Connection to the wall – extend the waterproofing up the vertical wall to the base, reinforcing the corner with sealing tape.
- Door threshold – tape under the threshold and fall from the door. This is the most challenging area of the entire balcony with a low threshold.
- Edge – balcony profile with a drip installed on the edge of the slab. Leave a gap of at least 5 mm between the profiles, which will be covered by a connector, allowing the profiles to expand.
- Passages – seal the railing anchors and other passages with a sleeve or tape.
- Expansion joints – bridge the expansion and transition joints with tape, for example, Ceresit CL 152 embedded in the first fresh layer and covered with the second. Maintain and fill the expansion joints in the tiles with flexible sealant.
Step-by-step procedure with liquid waterproofing
- Clean the substrate and remove loose parts, dust, and remnants of old layers.
- Repair the fall with a sloping layer of material for outdoor use, for example, according to the pulled strips at the desired height.
- Prime the substrate according to the manufacturer's system.
- Install the edge profile with a drip and connectors.
- First layer of waterproofing and embed sealing tapes in corners, expansion joints, at the threshold, and around passages.
- Second layer crosswise over the first, total thickness according to the technical data sheet – at CL 50 on the balcony at least 1.4 mm.
- Tile adhesion with flexible adhesive for outdoor use over the entire surface without voids, applying to both the substrate and the tile. For CL 50, this can be done after 5 hours.
- Grouting with grout for outdoor use and filling the expansion joints with flexible sealant.
Work in dry weather. Ceresit states for CL 50 that the air and substrate temperature should be +5 to +25 °C. You can find frost-resistant tiles for outdoor use in the e-shop under the category Outdoor Tiles.
Repairing a leaking balcony
If the waterproofing under the adhered tiles is damaged, usually the only option is to remove the tiles, repair the underlying concrete, and redo the waterproofing and tiling. New layers can also be applied over the original tiles – only if they are firmly adhered, without voids, have the correct fall, and the technical data sheet allows it. In substrates with micro-cracks, a fibreglass mesh is embedded in the waterproofing, and when adhering to old tiles, Ceresit recommends using the adhesive bridge CN 94. In an apartment building, the balcony is often a common area – therefore, discuss the repair in advance with the manager.
Sources: technical data sheets for Ceresit CL 50 (thickness, consumption, bridging cracks, adhesion after 5 hours, temperature) and CL 152 (bridging expansion joints), Ceresit brochures (system solutions, balconies and terraces above heated rooms), Sika – brochure of certified systems for balconies and terraces 06/2026 (fall 1.5 to 2.5 %, expansions), Baumit – technological procedure for waterproofing balconies (fall 2 %, adhesion to substrate and tile), Izomat – technical data sheet for balcony profile and connector (gap 5 mm), Czech Buildings – balcony and terrace repairs; our article Terrace: 2 cm tiles for outdoor use.
Terms in the glossary: Waterproofing · Fall · Flexible Adhesive (C2TE S1) · Tiles on Pedestals · Floor Drain (point drain) · Linear Shower Drain
Frequently Asked Questions
What fall should a balcony have?
From the house to the edge. Sika recommends 1.5 to 2.5%, Kreisel at least 2%, and Ceresit for waterproofing CL 50 outdoors at least 2.5%. The fall is created in the substrate, not by the thickness of the adhesive.
Is the floor tile on the balcony waterproof?
No. Water can seep under the tiles through joints and micro-cracks. Only the waterproofing under the tiles is waterproof, which directs water to the edge.
Can waterproofing be applied over old tiles?
Only if the old tiles are firmly adhered, not hollow, have the correct fall, and the technical data sheet of the waterproofing allows it. The tiles must be cleaned, degreased, and coated with an adhesive bridge, and a mesh should be inserted in case of cracks.
What thickness should the waterproofing on the balcony have?
According to the technical data sheet. For example, Ceresit CL 50 on balconies and loggias should be at least 1.4 mm after drying, applied in two layers, each no more than 1 mm.
When can I tile over the waterproofing?
According to the technical data sheet of the waterproofing. With Ceresit CL 50, tiles can be adhered after 5 hours, using exterior adhesive applied continuously without voids.
Who repairs the balcony in an apartment building?
The balcony is usually a common part of the building, so discuss the waterproofing repair in advance with the manager. Do not change the balcony floor without agreement.
AI Advisor
Have a question on the topic? Ask the advisor – they will respond based on TGB Kúpeľne articles.
AI advisor – answers are generated by artificial intelligence from TGB Kúpeľne articles and may contain errors.
Bathroom design
These are tips. We will draw your bathroom for you.
In the 3D bathroom planner, you can design your bathroom yourself for free. We will prepare a custom visualisation with specific wall tiles for you in the studio – free of charge with your purchase.
Online design for free Custom visualisation
TGB Kúpeľne Studio · Bratislavská 71, Senec · Map