Taps and showers
Concealed sink mixer: what to prepare before tiling
A concealed basin mixer has two parts: the body, which is embedded in the wall before tiling, and the external part with the spout and lever, which is installed only after the tiling is complete. Therefore, you must have selected both the basin and the specific mixer before tiling – based on these, the height of the body, its depth in the wall, and the length of the spout aimed at the centre of the bowl are determined. Once the tiling is done, none of this can be adjusted.
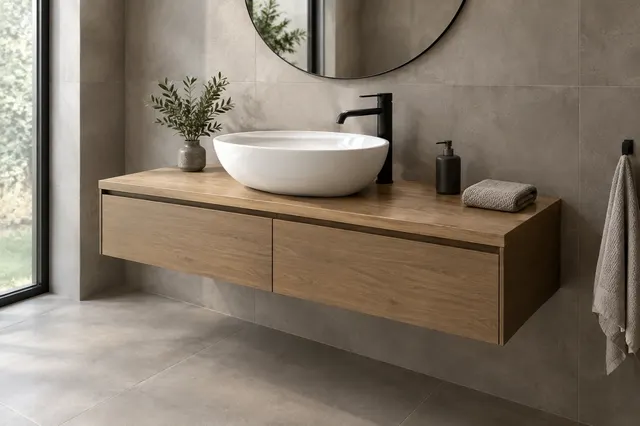
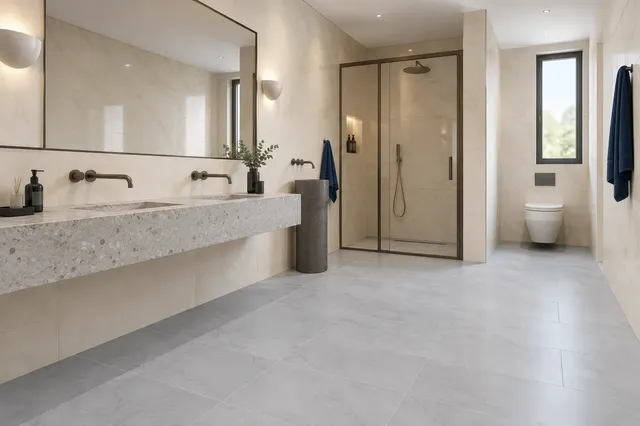
A mixer protruding from the wall above the basin looks clean, and the area around the basin remains free – water does not collect around the base of the mixer. Therefore, a concealed basin mixer is particularly suitable for a countertop basin and minimalist bathrooms. However, it has one crucial property: most decisions are made before tiling. Once the tiles are on the wall, you cannot change the height or position of the body without demolition. In this article, you will find out what the mixer consists of, how to determine the height and length of the spout, and what to check while the wall is still open.
Where a concealed mixer is suitable
- countertop basin – a high stand mixer on the countertop is an alternative, but a wall-mounted mixer leaves the countertop completely free,
- basin without a tap hole – wall-hung or freestanding basin where the mixer has no place other than on the wall,
- small basin in the WC – nothing obstructs the narrow edge of the basin,
- bathroom with a concealed shower – mixers from the same series on the wall look uniform.
What the mixer consists of
| Part | When it is installed | What you need to know |
|---|---|---|
| body (basic body) | before tiling, during plumbing | is embedded in the wall or installation wall, connected to hot and cold water |
| external part (top set) | after tiling and grouting | lever, spout and cover rosettes; must belong to the body according to the manufacturer's instructions |
Manufacturers indicate which body the external parts belong to. For example, Hansgrohe specifies the basic body 13622180 for the concealed basin mixer Metris 31086000, and for Ideal Standard Connect Air, the body is ordered separately, and without it, you cannot install the mixer. Therefore, buy the body only when you have also selected the external part – and buy them together.
Some systems have a universal body for multiple designs of the same brand. Even then, the rule applies that the body and external part are from the same manufacturer.
Height of the mixer above the basin
A wall-mounted basin mixer is typically installed around 110 to 115 cm above the floor. However, the exact height is determined by the basin:
- countertop basin – the spout should be above the rim of the bowl so that hands can be washed comfortably underneath without splashing water,
- wall-hung basin without a tap hole – the top edge of the basin is usually around 85 cm above the floor, with the spout above it,
- furniture basin with a cabinet – consider the height of the cabinet and countertop.
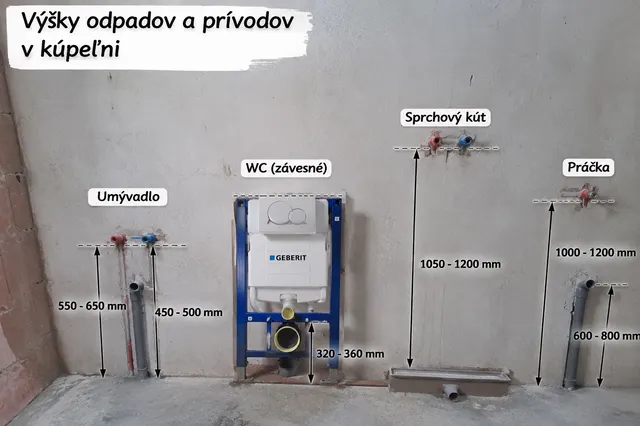
Measure the height from the finished floor, not from the screed, and record it in the documents for the installer. You can find the installation heights of other fixtures in the section Installation heights and the heights of drains and supplies in the article Heights of drains and water supplies.
Length of the spout: water to the centre of the bowl
Water should fall approximately into the centre of the bowl, above the drain. The length of the spout is therefore chosen according to the distance from the wall to the centre of the drain of the basin. Manufacturers offer spouts of various lengths, for example:
| Mixer (example) | Length of outlet |
|---|---|
| Hansgrohe Metris New 31251000 | 165 mm |
| Hansgrohe Logis, concealed mixer basin | 195 mm |
| Hansgrohe Metris 31086000 | 225 mm |
| Ideal Standard Connect Air A7009A5 | Distance from the wall 225 mm |
When calculating, consider the thickness of the wall tiles and adhesive – the outlet is measured from the finished wall. A short outlet directs water to the back edge of the bowl, while a long one sprays high above a shallow bowl. For a shallow bowl on a countertop, a shorter outlet and lower installation are preferable.
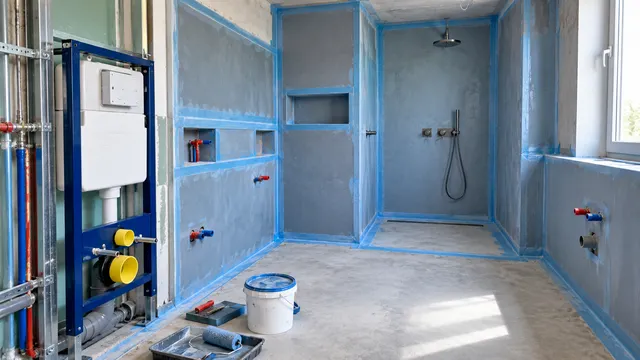
What to prepare before tiling
- Select a basin and mixer – a specific model, not "any concealed mixer". The height, position, and length of the outlet will be determined according to the technical sheets.
- Determine the position on the wall – usually in line with the basin. Some mixers have the lever on the left or right of the outlet; for example, the Hansgrohe Metris 31086000 can be placed on either side.
- Prepare the opening or mounting – in a masonry wall, an opening is cut according to the dimensions of the body, for a single body Oltens, for example, approximately 180 × 80 mm and a depth of 46 to 58 mm. In the installation wall, the body is attached to a mounting plate or beam according to the manufacturer's instructions.
- Set the depth – the body must be installed in the wall deep enough so that after tiling, it sits flush with the thickness of the wall tiles and adhesive as per the instructions. Most bodies have markings or a protective cover that indicates the correct level.
- Connect the water – hot and cold according to the markings on the body.
- Test for leaks – before covering the wall, the plumber pressurises the pipes and checks the joints.
- Take a photo and measure – photograph the position of the body and pipes with a tape measure; you'll appreciate it years later.
Water pipes are installed by a plumber. After tiling, the depth from the surface of the wall tiles to the thread of the body is measured according to Hornbach's instructions, the extension is cut to the required length, and the outer part with the rosette is fitted. You can find the entire sequence of work during the renovation in the article Bathroom renovation step by step.
Advantages and disadvantages
| Advantages | Disadvantages |
|---|---|
| free countertop around the basin, easy cleaning | decisions need to be made before tiling |
| clean, minimalist appearance | the body and outer part are more expensive than a standard mixer |
| suitable for a countertop basin even without a hole | if there is an error in height or depth, the wall tiles need to be demolished |
| during replacement, the outer part is changed, the body remains | the replacement outer part must fit the body |
Example price on vkupelni.sk (as of November 2026): concealed basin mixer Deante Alpinia for €127.36. When comparing prices, check whether the body is included or purchased separately.
Concealed mixer and water heater
A concealed mixer requires hot water under pressure – from a boiler, furnace, or pressure heater. It is not suitable for a non-pressurised heater above or below the basin; a mixer designed for non-pressurised heaters is needed there. For a flow heater, check in the technical sheet whether the mixer is suitable for it – for example, Hansgrohe states this for the concealed mixer Logis. More in the article Flow mixer with water heating.
Common mistakes
- body installed before the basin was selected,
- height measured from the screed instead of from the finished floor,
- body too deep or too shallow relative to the wall tiles,
- short outlet – water flows down the back wall of the bowl,
- outer part of a different brand that does not fit the body,
- covered wall without a leak test,
- mixer off-centre from the basin.
You can see concealed mixers and countertop basins live at the store in Senec – on the displayed setups, you will see how high the outlet is above the bowl and how far it reaches. Schedule a visit. You can also find mixers in the category Basin mixers on vkupelni.sk.
Related: Bath and basin mixer · Countertop basin · Shower mixer · Installation heights · Renovation step by step
Sources: technical data from Hansgrohe (Metris 31086000, Metris New 31251000, Logis), Ideal Standard (Connect Air A7009A5), Hornbach – installation guide for concealed mixers, Oltens – installation guide for concealed basin mixers, e-shop vkupelni.sk (price, November 2026).
Terms in the glossary: Concealed mixer · Freestanding bath · Installation wall · Screed
Frequently Asked Questions
What needs to be prepared for a concealed sink mixer?
Before tiling, select the sink and specific mixer, install the body at the correct height and depth according to the instructions, connect hot and cold water, and perform a tightness test. The external part is installed only after tiling.
How high should a wall-mounted basin mixer be installed?
Typically around 110 to 115 cm above the finished floor. The exact height is determined by the basin – for a countertop basin, the spout should be above the rim of the bowl so that hands can be washed comfortably without splashing water.
What length should the spout of a concealed mixer have?
It should be such that the water falls into the centre of the bowl above the drain. It is measured from the finished wall to the centre of the drain. Manufacturers offer spouts of 165, 195 or 225 mm, for example.
Can I buy an external part from a different brand for the body?
Generally no. The body and external part must belong to the same manufacturer's system – manufacturers indicate which body the external parts belong to. Therefore, buy them together.
Can a concealed mixer be connected to a low-pressure water heater?
No, it requires hot water under pressure. A low-pressure water heater requires a mixer designed for low-pressure heaters. With a flow heater, check the suitability in the technical data sheet of the mixer.
What if the concealed mixer breaks?
The body remains in the wall and the cartridge or external part is replaced. When changing the design, buy the external part that the manufacturer specifies for your body.
AI Advisor
Have a question on the topic? Ask the advisor – they will respond based on TGB Kúpeľne articles.
AI advisor – answers are generated by artificial intelligence from TGB Kúpeľne articles and may contain errors.
Bathroom design
These are tips. We will draw your bathroom for you.
In the 3D bathroom planner, you can design your bathroom yourself – for free and without registration. If you want assurance, we will prepare a photorealistic custom visualisation based on actual dimensions and specific tiles in the studio. It's free with a purchase.
Online design for free Custom visualisation
TGB Kúpeľne Studio · Bratislavská 71, Senec · Mon–Fri 8:00–12:00 and 12:30–17:00, Sat 9:00–12:00 · Map