Maintenance and repairs
Cracked tile: how to replace one tile without demolition
You can replace one cracked tile without demolition: carefully scrape the grout around it with an oscillating tool, break the tile from the centre and remove it, clean the substrate from the old adhesive and apply the new tile with full coverage in the adhesive to avoid voids underneath. You can grout only after the time specified in the technical data sheet of the adhesive – with standard adhesive on the floor, at least after 24 hours. If tiles are cracking in a row, the floor is hollow, or there is a crack in the shower, the cause is deeper and a tiler is needed.
A bottle, hairdryer, or hammer falls – and there’s a crack in the tile. A cracked tile is not just a cosmetic flaw: water and dirt can get through the crack, and sharp edges can cause injury. You don’t need to demolish the entire floor for this; you can replace one tile separately. We will explain how to determine the cause, what to prepare, how to remove the tile and apply a new one, and when it’s better to call a tiler.
Why did the tile crack
| What do you see | Probable cause | What does it mean |
|---|---|---|
| one tile, crack from one point | impact | just replace the tile |
| the tile sounds hollow when tapped | cavity under the tile, adhesive only at points | replace and apply with full coverage, check the surroundings |
| the crack runs through multiple tiles in a row | movement of the substrate, missing expansion joint | the cause is in the substrate, tiler |
| cracks at the wall or at the threshold | missing grout joint at the wall, tension | tiler, silicone expansion joint |
| fine hairline cracks in the glaze | tension in the glaze | tile is secure, just seal the cracks |
Before replacement, tap on the surrounding tiles with the handle of a screwdriver. A solid sound is fine, a hollow sound means that adhesive is missing under the tile – such a tile may crack again.
What to Prepare
- Replacement tile – from the same series, the same size, and ideally from the same batch to match the shade. Therefore, it is worth setting aside a reserve when laying – how much, we describe in the article How much wall and floor tiles to buy.
- Tile adhesive – cement adhesive according to EN 12004 suitable for the given wall tiles and substrate. For underfloor heating and critical substrates, flexible adhesive is required, for example, Ceresit CM 11 PLUS according to the technical data sheet for underfloor heating does not belong.
- Grout of the same colour, in the bathroom class CG2WA, or possibly epoxy.
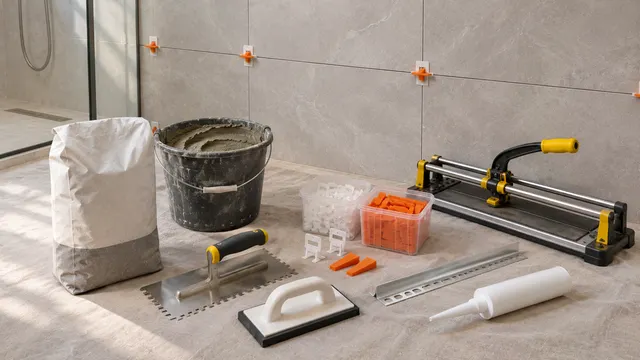
- Tools – oscillating tool with a grout tool or scraper, chisel and hammer, notched trowel, rubber grout float, spacers, spirit level.
- Protection – goggles, gloves, adhesive tape, and foil to cover the drain and surrounding area.
Replacing a tile step by step
- Cover the surroundings and drain – debris and dust must not enter the waste or scratch the surrounding tiles.
- Scrape out the grout joint around the cracked tile all the way around. Work slowly and push the tool into the joint, not into the edge of the adjacent tile. Do not use a grinder – Bosch warns that diamond cutting discs for cutting joints are not intended for this.
- Break the tile from the centre – tape it, place the chisel in the centre or in the crack and gently tap. Remove the fragments from the edge towards the centre to avoid breaking the edge of the adjacent tile. Wear goggles.
- Clean the substrate of old adhesive so that the new tile sits flush with the surroundings. The substrate must not be greasy, dusty, or damp.
- Check the substrate – if there is a void under the tile, crumbling screed, or moisture, replacing the tile will not solve the problem.
- Apply adhesive with a notched trowel to the substrate and a thin layer to the back of the tile to avoid voids underneath.
- Insert the tile and press it flush with the surroundings, check with a spirit level. Use spacers to maintain the width of the grout joint.
- Clean the joints of excess adhesive while it is fresh – hardened adhesive can only be removed mechanically.
- Grout after the time specified in the adhesive's technical data sheet and finally fill the corners and transitions at the wall with silicone.
| Step | Ceresit CM 11 PLUS according to the technical data sheet |
|---|---|
| grouting the floor | not before 24 hours |
| grouting porcelain stoneware on the wall | after 8 hours |
| large formats and narrow joints | time is extended |
| full load | after 7 days |
Other adhesives have different times, always follow the technical data sheet of the product you use. Cement adhesive reacts alkaline with water, protect your eyes and skin while working.
Cracked tile in the shower and by the bath
In the shower, there is waterproofing under the wall tiles – a membrane and strips that protect the wall and floor from water. Water can reach the adhesive and substrate through a crack in the tile and in the grout joint, so do not delay. When removing the tile, be careful not to cut or damage the waterproofing.
- if the waterproofing under the tile is intact, proceed as above,
- if it is damaged, repair it with material from the same system – for example, for Ceresit CL 51 waterproofing, wall tiles can be adhered after 4 hours according to the technical data sheet,
- if the substrate is wet, walls are damp, or mould appears, water has been leaking for longer – call a tiler or plumber.
Where waterproofing belongs, we describe in the chapter Bathroom waterproofing, signs of leaking in the article Mould and leaking in the shower.
When you don't have the same tile
- Look for it by the box – manufacturer, series name, size, and shade or batch. With a photo of the tile or a piece of the box, we can help you find out if the series is still available at the store.
- Move a tile from a less visible place – for example, from under the washing machine or behind the toilet – to a visible place and place a replacement that differs slightly in a hidden spot.
- Make a necessity intentional – if several tiles are damaged, replace them with decor or contrasting tiles of the same size in a regular pattern.
Hairline crack in the glaze
If the tile is secure, does not sound hollow, and there are only fine hairline cracks in the glaze, you do not need to replace it. Ceresit states that impregnation CT 10 will seal the cracked surface of wall and floor tiles with cracks up to 0.2 mm wide, such as cracked glaze. Wider cracks and sharp edges should be addressed by replacing the tile. How to treat joints and wall tiles is described in the article Cleaning joints.
When to call a tiler
- cracks extend across multiple tiles or reappear after replacement,
- when tapped, a larger area sounds hollow,
- the crack is in the shower and the walls or floor are damp,
- under the floor tiles is electric underfloor heating – the heating cable is in the adhesive or in the layer under the floor tiles and can be easily damaged during chiselling; the intervention is decided by an electrician and a tiler,
- it is a large format, for example, 60 × 120 cm or more – removing it without damaging adjacent tiles is challenging,
- the tile is under the bath, shower enclosure, or kitchen unit.
We also offer turnkey renovation of bathrooms – how to proceed and what to prepare is described in the article Bathroom renovation step by step. You can find out how to choose a tiler in the article How to choose a tiler and a company.
How to prevent cracking
- when laying, full-surface bonding without voids, especially with large formats,
- expansion joints at walls and on large areas filled with silicone,
- for underfloor heating, use adhesive and procedure according to the manufacturer,
- soft padding under heavy objects that may fall – for example, a mat by the sink,
- when drilling into tiles, use a tile drill without percussion.
We will show you samples of wall tiles and floor tiles, adhesives and grouts at our store in Senec – bring a photo or a piece of tile. Schedule a visit. You can also find floor tiles and wall tiles in the categories Floor tiles and Wall tiles on vkupelni.sk.
Related: Cleaning Grout · Bathroom Waterproofing · Adhesive, Grout and Profiles · How much wall tile to buy · Maintenance and Repairs of Bathrooms
Sources: technical data sheet Ceresit CM 11 PLUS (class C1T according to EN 12004, grouting, full load, usage restrictions, alkaline reaction with water), technical data sheet Ceresit CL 51 according to the data in the technical data sheet CM 11 PLUS, technical data sheet Ceresit CT 10 (cracks up to 0.2 mm), technical data sheet Mapei Ultracolor Plus (preparation of joints, CG2WA according to EN 13888), Bosch – diamond blades for tiles (not for cutting joints).
Terms in the dictionary: Sanitary silicone · Caliber and shade (batch) · Underfloor heating · Flexible tile adhesive (C2TE S1) · Grout · Epoxy grout (RG)
Frequently Asked Questions
Can one tile be replaced without demolition?
Yes. Scrape the grout around it, break the tile from the centre and remove it, clean the substrate from the adhesive and apply the new tile with full coverage. After some time, according to the technical data sheet of the adhesive, you can grout it.
How to remove a cracked tile without damaging the adjacent ones?
First, scrape the grout around the entire perimeter with an oscillating tool or scraper. Tape the tile, break it with a chisel from the centre and remove the pieces towards the centre, not from the edges of the adjacent tiles.
When can I grout after replacing a tile?
According to the technical data sheet of the adhesive. With Ceresit CM 11 PLUS, at least after 24 hours on the floor and after 8 hours on the wall with gres; large formats and narrow joints extend the time. Full load can be applied after 7 days.
What if I don't have the same tile?
Look for the manufacturer, series, size, and shade on the box. It also helps to move a tile from a less visible spot, such as under the washing machine, or to replace damaged tiles with decor in a regular pattern.
Why did the tile crack in the bathroom?
Most often due to impact, a cavity under the tile, or movement of the substrate. If the crack runs through multiple tiles in a row or the floor sounds hollow, the cause is in the substrate and a tiler is needed.
Can a crack in a tile be glued?
Only fine hairline cracks in the glaze, when the tile is firmly held – Ceresit states that sealing CT 10 will close cracks up to 0.2 mm. Wider cracks and sharp edges need to be addressed with replacement.
AI Advisor
Have a question on the topic? Ask the advisor – they will respond based on TGB Kúpeľne articles.
AI advisor – answers are generated by artificial intelligence from TGB Kúpeľne articles and may contain errors.
Bathroom design
These are tips. We will draw your bathroom for you.
In the 3D bathroom planner, you can design your bathroom yourself – for free and without registration. If you want assurance, we will prepare a photorealistic custom visualisation based on actual dimensions and specific tiles in the studio. It's free with a purchase.
Online design for free Custom visualisation
TGB Kúpeľne Studio · Bratislavská 71, Senec · Mon–Fri 8:00–12:00 and 12:30–17:00, Sat 9:00–12:00 · Map